node-red-contrib-jung-0.0.4.zip - for Windows
jung-node-red-contrib-0.0.4.tgz - for Node-Red Palette
Notice: you need to rename Node and Deploy flow, in order to force-update on Node-RED.
node-red-contrib-jung-0.0.8.zip - for Windows
jung-node-red-contrib-0.0.8.tgz - for Node-Red Palette
                  cd C:\node-red
                  npm install node-red
                  cd C:\node-red\node_modules\node-red-contrib-jung
                  npm install
                  cd C:\node-red\node_modules\.bin\
                  node-red.cmd
Open your Node-RED installation on web browser, http://localhost:1880 and start having some fun :)
bash <(curl -sL https://raw.githubusercontent.com/node-red/linux-installers/master/deb/update-nodejs-and-nodered)
node-redAnd open in your web browser http://localhost:1880.
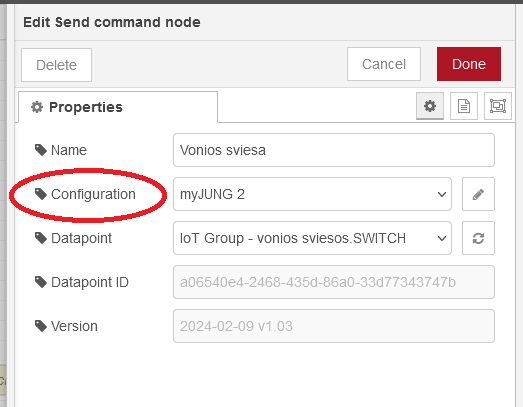
Configuration node is "service" node, accessible from "main" nodes send command and receive status.

In Configuration node you copy/paste Authentication token - that you find in jung-api.test.agentilo.com/Identity/Account website:
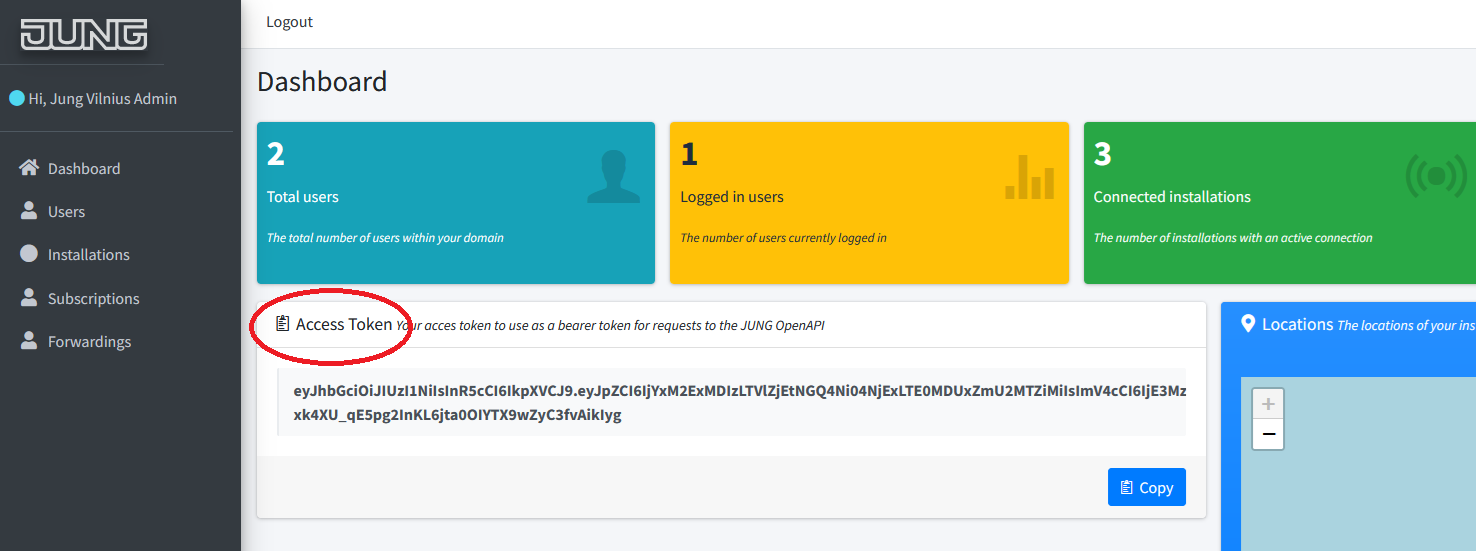
Then you click on "Update now" - and if all is ok, "Datapoints" text field will fill-in with technical text data - here are datapoints of your projects. From this moment, your datapoints will be available in "Send command" and "Receive status" nodes.
"Callback URL" is a special topic.
If we speak about your local Node-Red installation, when there is a change on JUNG Cloud, the Cloud sends new data (new status) back to your local Node-Red installation. This data is sent to special address - so called "Callback URL". This means, that in order to receive data from JUNG Cloud, your local Node-Red installation must be reachable from the Internet (JUNG Cloud). Practically this means that (a) you must have external IP address and (b) a port forward in your internet router to the PC, where your local Node-Red is running.
Port 80/tcp on your "external IP" must be forwarded to "internal nodered IP", port 1880/tcp
If you do not intend to use Status node - you can enter some "smart nonsense" here, like: http://nodered.jung.lt/nonsense.
The situation is a bit easier if you use Node-Red on some provider website - in cloud. Then you alread have URL to your Node-Red cloud installation, you just enter this URL here, so that JUNG Cloud knows where your Node-Red cloud is installed.
Send command node requires no special setup. Some configuration fields are visible, but disabled - they are used just to display some technical information, usefull for development, like version number or datapoint GUID. In the final version these fields will probably be removed.
For switch testing, you can use Inject Node, with msg.payload boolean true/false.

Receive status node requires that your Node-Red is accessible from JUNG Cloud. In order for Receive status node to function correctly, "Callback URL" must be defined in Configration.
Call scene A or scene B, depending on who is unlocking the door.
Floor heating has native delay of 4-6 hours. If my windows are south-oriented, and heating is controlled by RCD (factual room temperature) and I have floor heating - then switching floor heating OFF when temperature is rising above setpoint because of sun - is too late. Floor is still warm, sun is heating - room temperature exceeds comfort and cooling starts.
The sun gives me +3 degrees in 45 minutes.
Although all is correct technically, but I am not happy for my expenses - cooling requires electricity.
Solution: use weather forecast Node. I can check it on 9:00 - and if day is to be sunny/without clouds - then I switch OFF floor heating at 9:00. At 12:00 my floor will be cool - but I start getting warmth from the sun. And I switch ON floor heating at 15:00.
If your Node-Red is installed localy - then you just type-in Hue Bridge IP address in Hue Node config. You will have to do Callback URL setup + port forward on your internet router, so that JUNG Cloud can send status to your local Node-Red installation.
If you are using Node-Red installed in the cloud - then you have no problems with Callback URL on JUNG nodes, but you have to do port forward on your internet router, so that Node-Red can send commands to your Hue Bridge.
If your Node-Red is installed localy, then "external IP", port 80/tcp must be forwarded to "internal nodered IP", port 1880/tcp.
I hope - no. The final architecture is not yet finalized. This port forward is required currently for field test installations.
If you have questions please contact arturas@jung.lt.
If you feel some feature is missing - please write me :)
Last update: 2024-02-26